Using the Command Line Interface
This document is meant to give an overview of all common tasks while using the CLI.
Note
For more information on CLI commands, see Command Line Interface and Environment Variables Reference
Set Up Bash/Zsh Completion
When using bash (or zsh) as your shell, airflow can use
argcomplete for auto-completion.
For global activation of all argcomplete enabled python applications run:
sudo activate-global-python-argcomplete
For permanent (but not global) airflow activation, use:
register-python-argcomplete airflow >> ~/.bashrc
For one-time activation of argcomplete for airflow only, use:
eval "$(register-python-argcomplete airflow)"
If you’re using zsh, add the following to your .zshrc:
autoload bashcompinit
bashcompinit
eval "$(register-python-argcomplete airflow)"
Creating a Connection
For information on creating connections using the CLI, see Creating a Connection from the CLI
Exporting DAG structure as an image
Airflow lets you print or save your DAG structure as an image. This is useful for documenting or sharing your DAG structure. You’ll need to have Graphviz installed.
For example, to print the example_complex DAG to the terminal:
airflow dags show example_complex
This will print the rendered DAG structure (similar to Graph) to the screen in DOT format.
Multiple file formats are supported. To use them, add the argument --save [filename].[format].
To save the example_complex DAG as a PNG file:
airflow dags show example_complex --save example_complex.png
This will save the following image as a file:
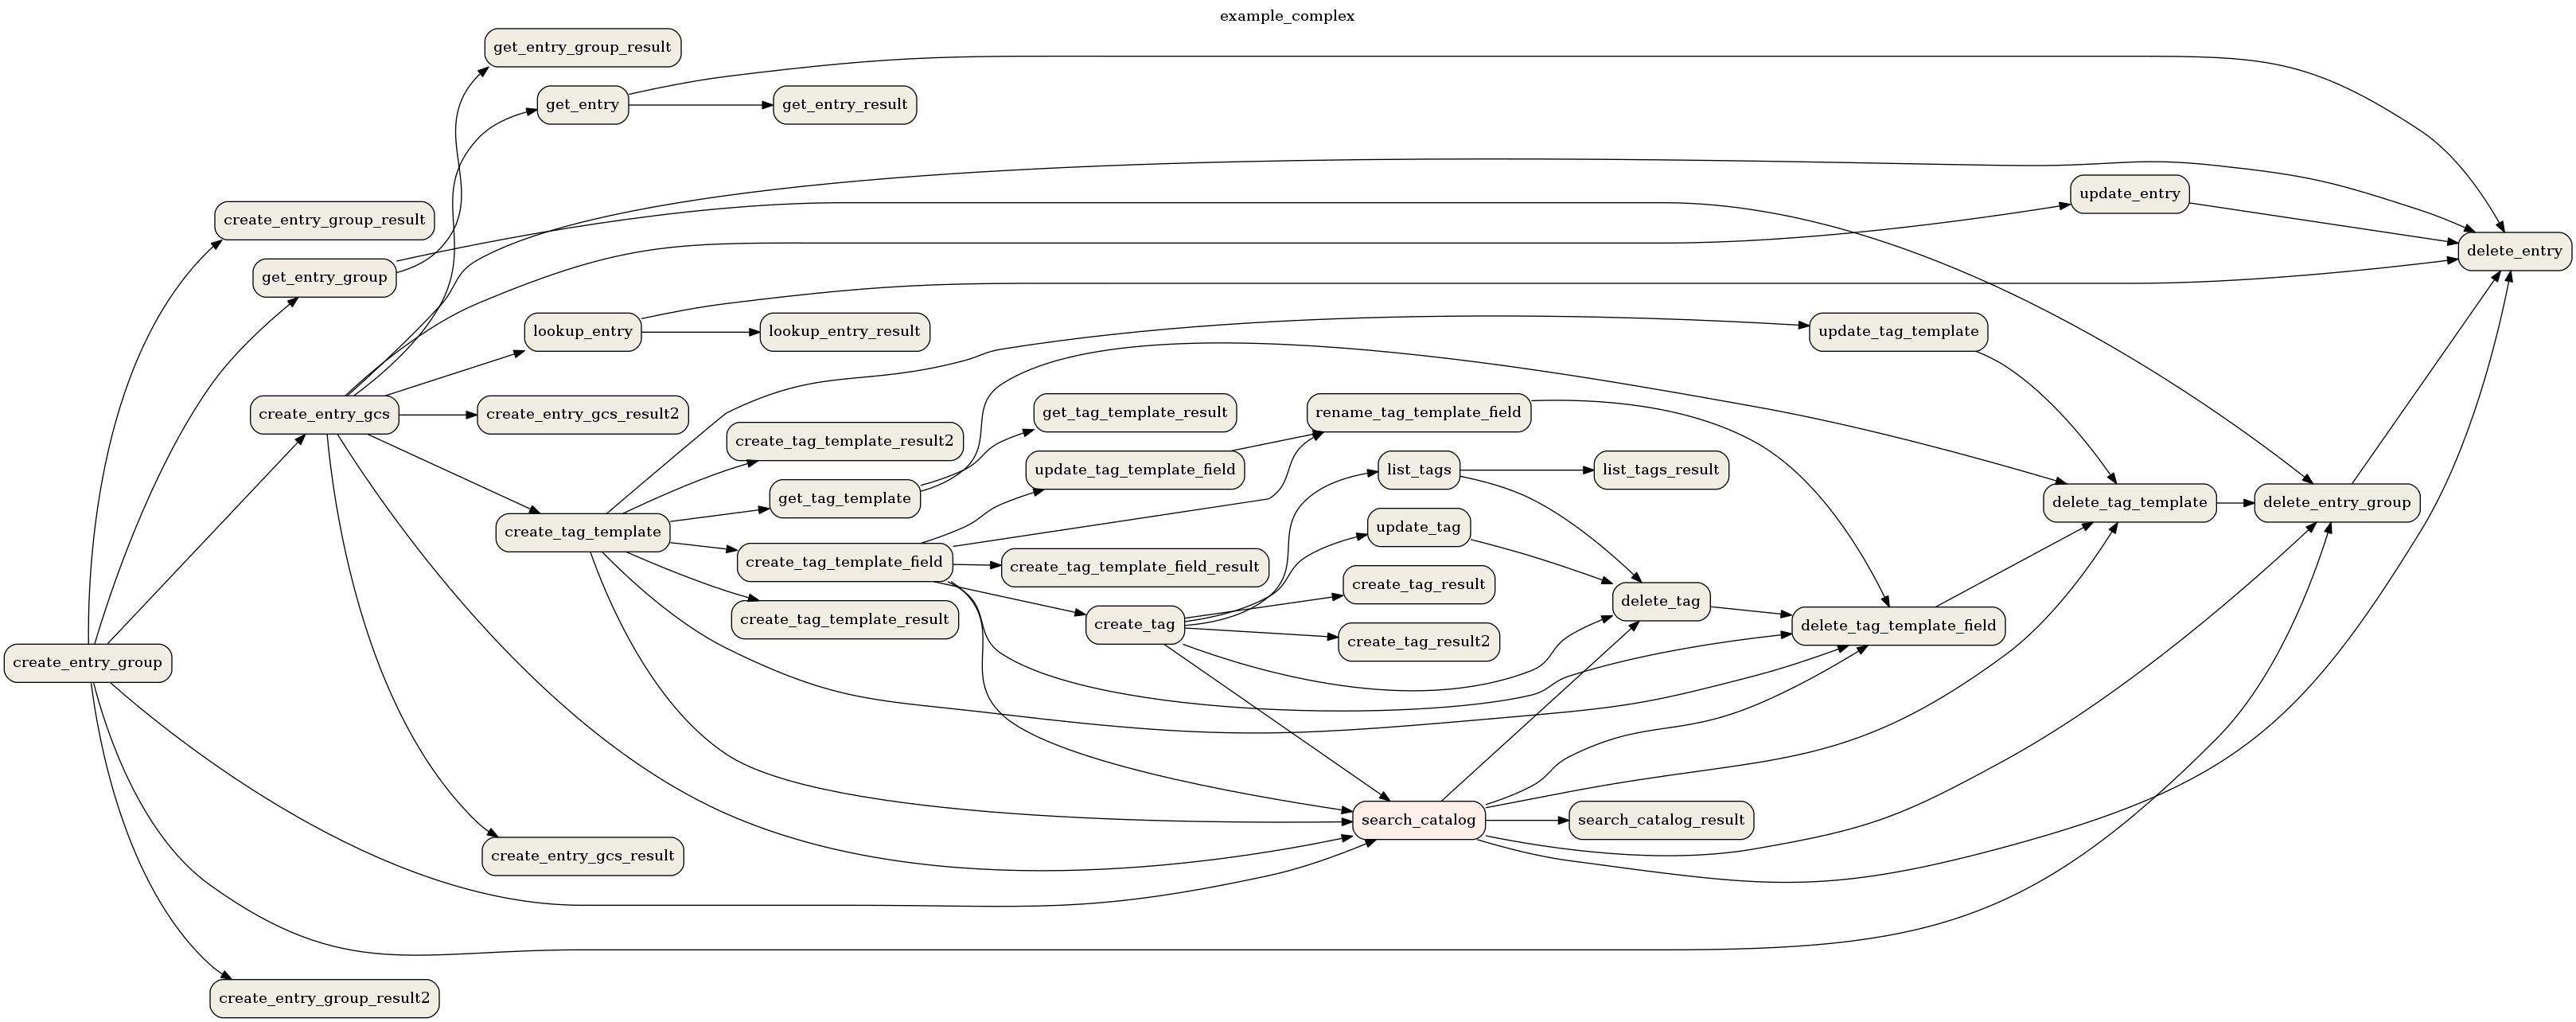
Example DAG representation
The following file formats are supported:
bmp
canon,dot,gv,xdot,xdot1.2,xdot1.4
cgimage
cmap
eps
exr
fig
gd,gd2
gif
gtk
ico
imap,cmapx
imap_np,cmapx_np
ismap
jp2
jpg,jpeg,jpe
json,json0,dot_json,xdot_json
pct,pict
pic
plain,plain-ext
png
pov
ps
ps2
psd
sgi
svg,svgz
tga
tif,tiff
tk
vml,vmlz
vrml
wbmp
webp
xlib
x11
By default, Airflow looks for DAGs in the directory specified by the dags_folder option in the
[core] section of the airflow.cfg file. You can select a new directory with the --subdir argument.
Display DAGs structure
Sometimes you will work on DAGs that contain complex dependencies. It is helpful then to preview the DAG to see if it is correct.
If you have macOS, you can use iTerm2 together with the imgcat script to display the DAG structure in the console. You also need to have Graphviz installed.
Other terminals do not support the display of high-quality graphics. You can convert the image to a text form, but its resolution will prevent you from reading it.
To do this, you should use the --imgcat switch in the airflow dags show command. For example, if you
want to display example_bash_operator DAG then you can use the following command:
airflow dags show example_bash_operator --imgcat
You will see a similar result as in the screenshot below.
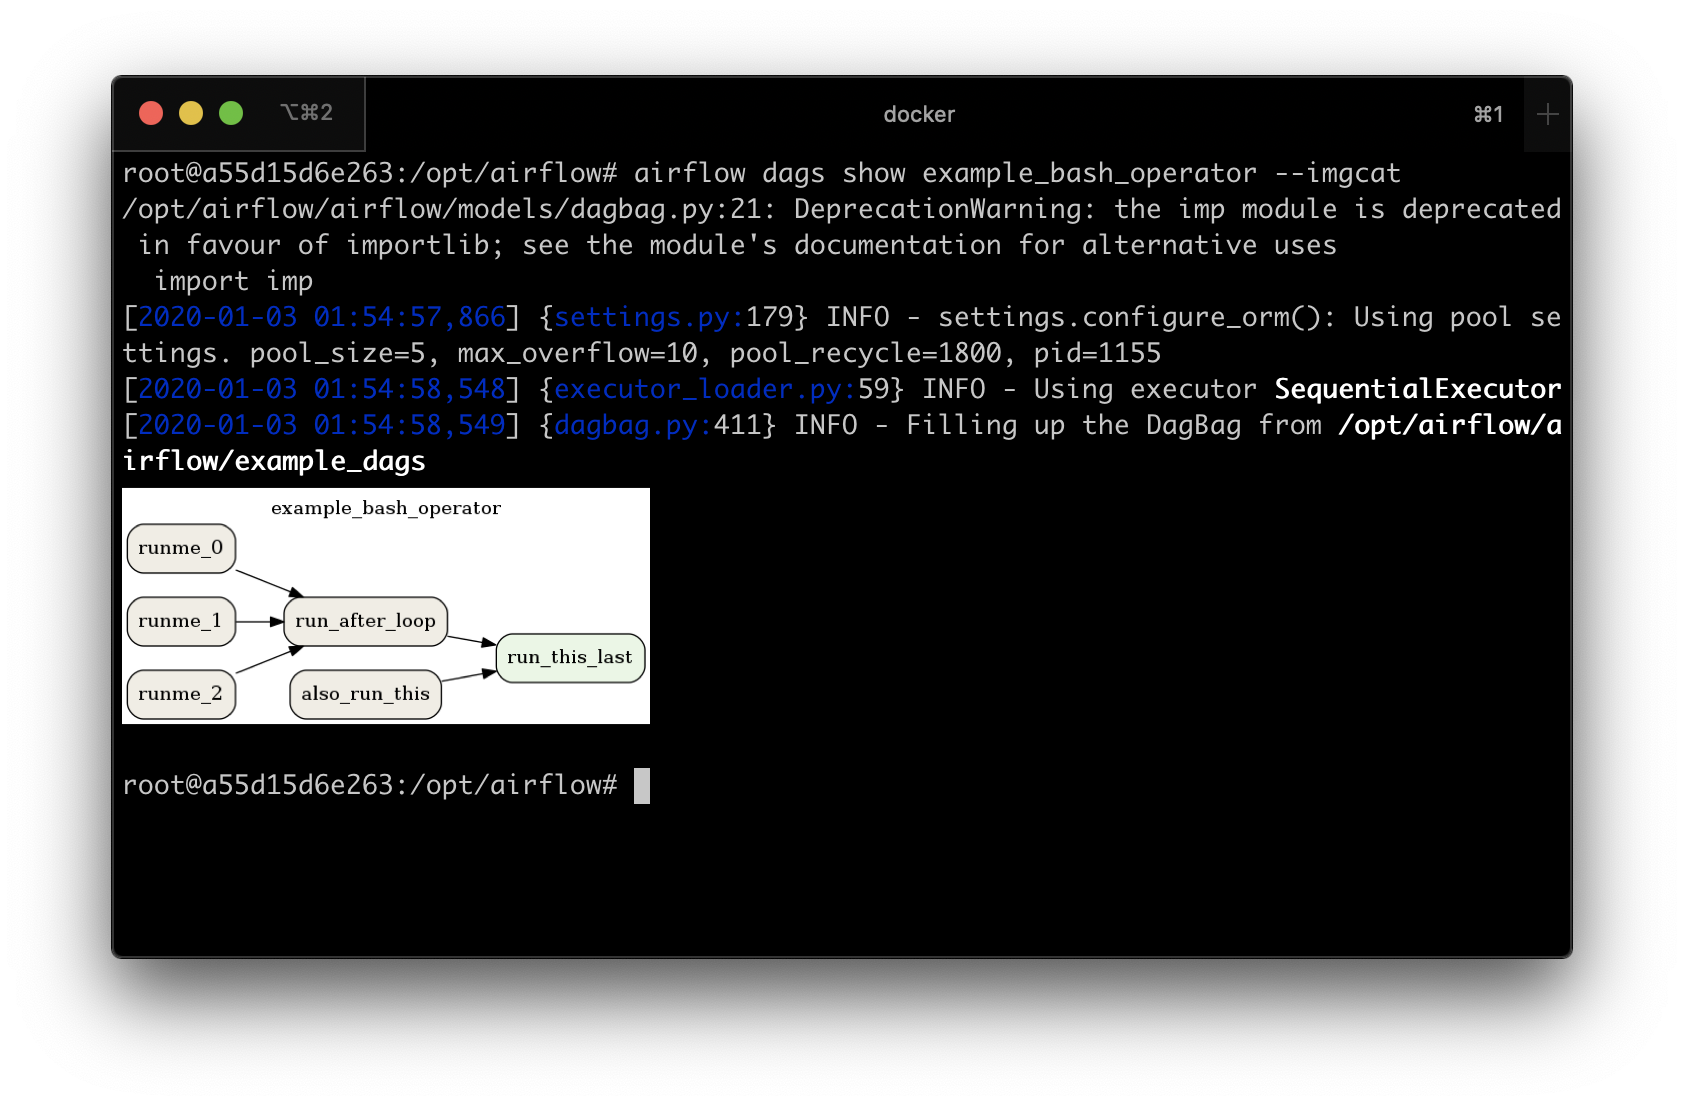
Preview of DAG in iTerm2
Formatting commands output
Some Airflow commands like airflow dags list or airflow tasks states-for-dag-run support --output flag
which allow users to change the formatting of command’s output. Possible options:
table- renders the information as a plain text table
simple- renders the information as simple table which can be parsed by standard linux utilities
json- renders the information in form of json string
yaml- render the information in form of valid yaml
Both json and yaml formats make it easier to manipulate the data using command line tools like
jq or yq. For example:
airflow tasks states-for-dag-run example_complex 2020-11-13T00:00:00+00:00 --output json | jq ".[] | {sd: .start_date, ed: .end_date}"
{
  "sd": "2020-11-29T14:53:46.811030+00:00",
  "ed": "2020-11-29T14:53:46.974545+00:00"
}
{
  "sd": "2020-11-29T14:53:56.926441+00:00",
  "ed": "2020-11-29T14:53:57.118781+00:00"
}
{
  "sd": "2020-11-29T14:53:56.915802+00:00",
  "ed": "2020-11-29T14:53:57.125230+00:00"
}
{
  "sd": "2020-11-29T14:53:56.922131+00:00",
  "ed": "2020-11-29T14:53:57.129091+00:00"
}
{
  "sd": "2020-11-29T14:53:56.931243+00:00",
  "ed": "2020-11-29T14:53:57.126306+00:00"
}